Where Is the Mysql Database Stored in Windows
The MySQL Workbench GUI is cross-platform, open source, and incredibly easy to use.
Many database administrators are comfortable working within the command line. To them, it's as efficient as a work environment can be. To others, however, the command line is too cumbersome to be efficient. Fortunately, for those users, there are plenty of GUIs available to make the task easier. One such GUI is MySQL Workbench. This particular tool is one of the finest locally installed MySQL client tools you'll find. It's cross-platform, open source, and incredibly easy to use.
I'm going to show you just how easy it is to make use of MySQL Workbench. To do so, I'll walk you through the process of creating a database, adding a table to that database, and then adding data to the table.
SEE: Server deployment/migration checklist (Tech Pro Research)
What you need
I'll use MySQL Working 6.3, which has drastically evolved from older versions of the tool. My instance of MySQL Workbench will connect to a MySQL database, housed on Ubuntu Server 18.04. You need to make sure you have MySQL set up for remote connections (See: How to set up MySQL for remote access on Ubuntu Server 16.04 (This also works for Ubuntu 18.04).
I will assume you already have MySQL Workbench installed.
Creating a database
The first thing to do is create a database (aka Schema). Open MySQL Workbench and connect to your database server. From the database home screen (Figure A), right-click a blank spot under the SCHEMAS pane and select Create Schema.
Figure A

The MySQL Workbench main window.
In the resulting window (Figure B), give the schema (database) a name and (if necessary) select a Default Collation.
Figure B

Creating a new database.
Once you name your schema, click the Apply button and, when prompted, review the SQL Script and click Apply again. Once the schema is created, close the SQL Script window. You're ready to create a table.
Creating a table
I've created a database called SERVERS, that will be listed in the SCHEMAS pane. Expand that listing, right-click the Tables entry, and select Create Table. In the new window (Figure C), name the table.
Figure C

Created with GIMP
Double-click under Column Name, and you should be able to type the name of the first column. Once you do that, you can then select the Datatype for the column (Figure D).
Figure D

Creating a column for the table.
Continue adding columns until your table is complete. Click Apply to execute the SQL Script. Your table is now ready for data.
Adding data to a table
It's now time to populate that table with some data. This is where it gets tricky. In previous incarnations of MySQL Workbench, a button could be found on the home screen that took you directly to the table data entry section. That is no more. In order to start adding data to a table, right-click the table (in the SCHEMAS pane) to be modified and click Select Rows. You will then find yourself in a window that allows you to enter data (Figure E).
Figure E
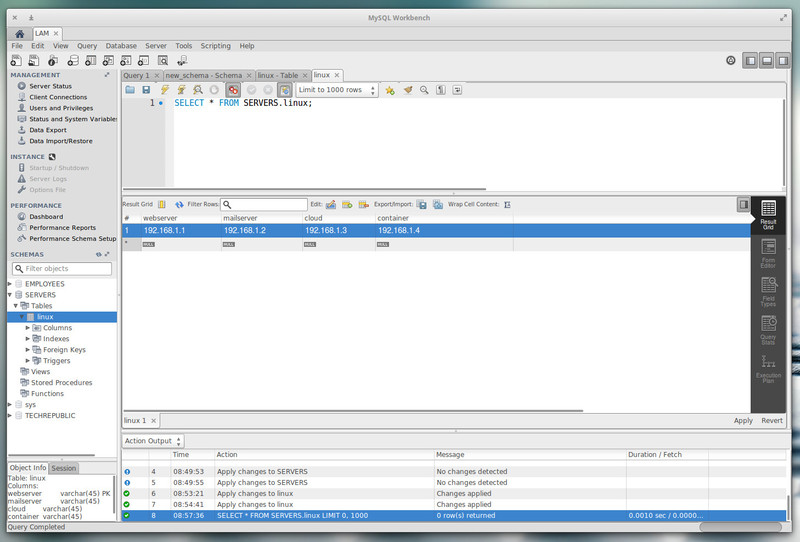
Adding data to a table.
In this window, you can either use the result grid or open the form editor. For the fastest route to success, use the result grid (which is the default). Double-click the first entry in one of your columns and type the data to be added. After entering the necessary data, hit Enter on your keyboard. Double-click under that newly created row and create another. Once you add all of your data, click Apply to execute the SQL Script.
The form editor is just as easy to use; you only need to remember to click the Next Entry button (single right-pointing arrow) to move to the next data row (Figure F), before entering new data.
Figure F
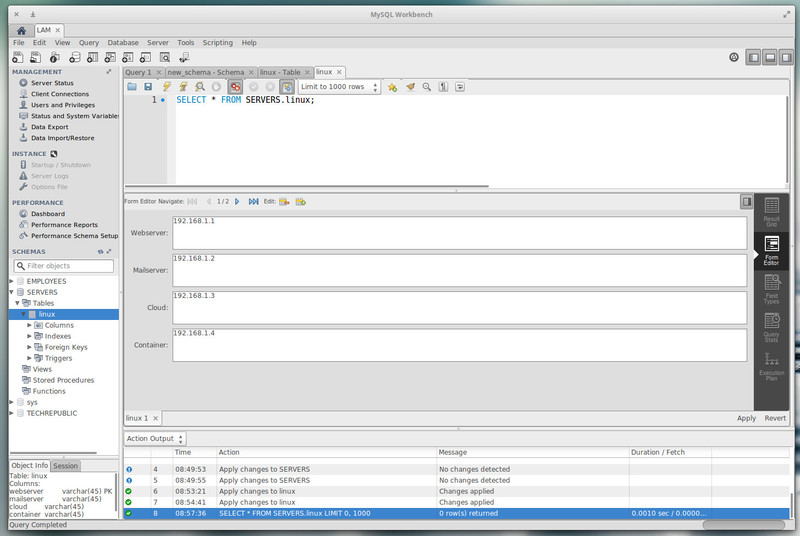
Using the Form Editor.
Your database is ready
Congratulations, you successfully created a database, added a table, and entered data into the table. Your database is ready to use.

Open Source Weekly Newsletter
You don't want to miss our tips, tutorials, and commentary on the Linux OS and open source applications. Delivered Tuesdays
Sign up todayAlso see
- How to add data into MySQL tables from the command line (TechRepublic)
- Why does Oracle keep trashing MySQL, its own product? (TechRepublic)
- How to export and import MySQL databases (TechRepublic)
- How to install MySQL on CentOS 7 (TechRepublic)
- MongoDB in 2019: Cloud, transactions, and mobile will be on the agenda (ZDNet)
- 5G mobile networks: A cheat sheet (TechRepublic)
- What is SDN? How software-defined networking changed everything (ZDNet)
- The Best VPN services for 2019 (CNET)

Image: Jack Wallen
Where Is the Mysql Database Stored in Windows
Source: https://www.techrepublic.com/article/how-to-create-tables-and-add-data-to-mysql-database-with-mysql-workbench/